Zapier allows you to automatically send new Facebook Lead Ads leads into AMPED as leads. Use the template to get started!
Getting Started:
To use this template, you will need the following:
- Zapier Account
- Facebook Lead Ads Account*
- AMPED Account
*Facebook Lead Ads is a Premium app in Zapier. You must be on at least the Zapier Starter Plan to use premium apps.
How to Setup the Template:
Click the “Use this Zap” button next to the template Name “Add new Facebook Lead Ads leads to AMPED” to begin configuration of the template.

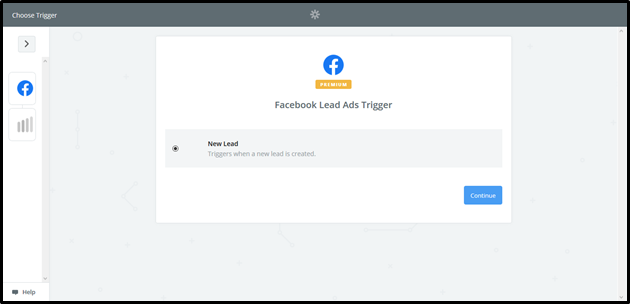
The Facebook Lead Ads Trigger “New Lead” will be automatically selected. Click “Continue” to move onto the next step.
Once the trigger has been selected, you must connect your Facebook account. Clicking “Connect an Account” will populate a new window where you will enter your Facebook account information. If the window does not appear, check your browser pop-up settings.
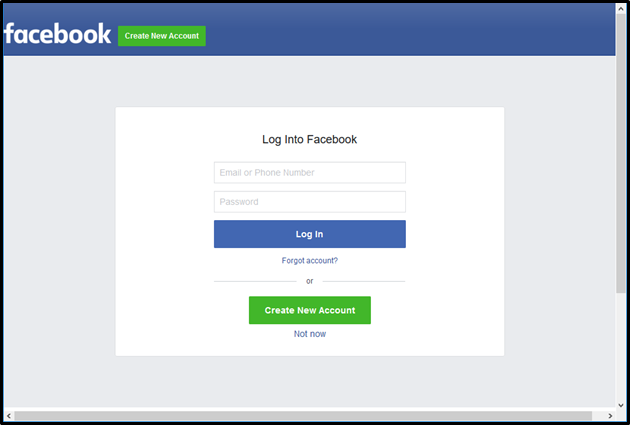
Once you have entered you Facebook credentials and clicked “Log In” you will be prompted to continue so that Zapier can authenticate and connect to your account.
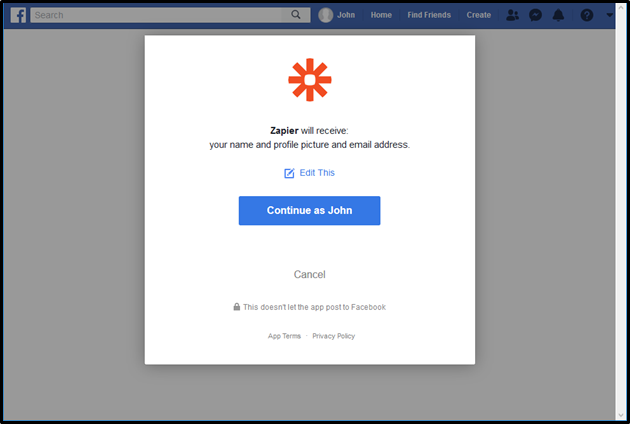
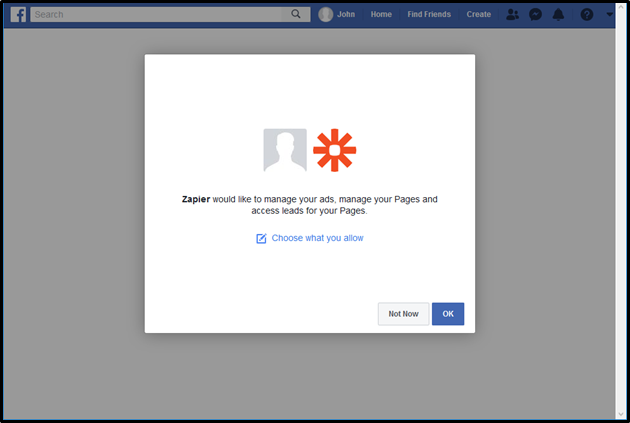
After clicking “Continue as Your Name”, Zapier will ask to manage your ads, manage your Pages and access leads for you pages. Click “OK” to allow this access.
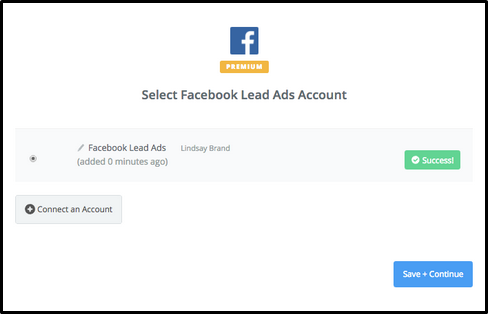
Once you have granted Zapier access to your account and it has connected, you will see a green “Success!” notification. Click “Save + Continue” to move onto the next step.

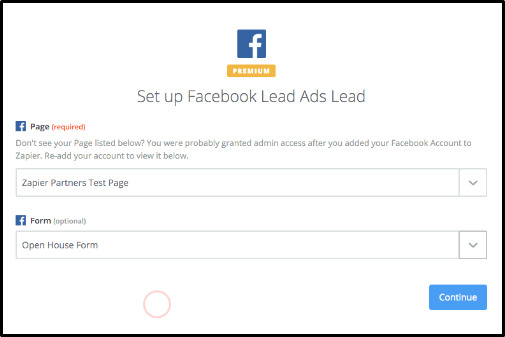
Next you will need to define the Facebook Page and Form that Zapier should look for new leads from. If you do not see the desired page or form click “Refresh Fields” and try again. Click "Continue" when you have selected your Page and Form.
If all steps were successful your Facebook Lead Ads account will now be connected. Click “Save + Continue” to move onto the next step.
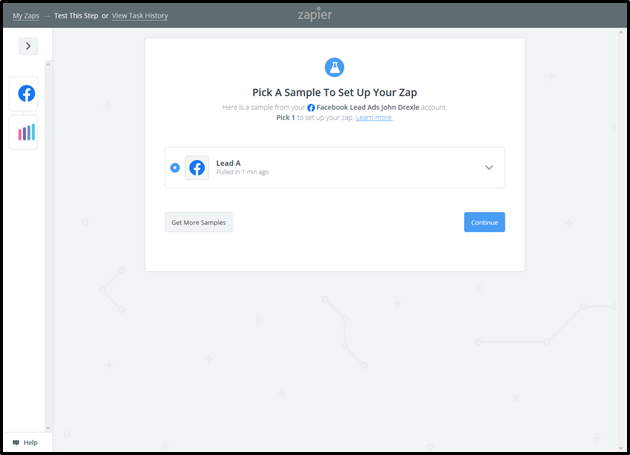
You will now be asked to choose a sample to setup your zap. Click “Pull in Samples” to find any sample leads in your account or use a default sample. If you do not wish to test, click “Skip This Step”.

After a sample lead has been selected. Click “Continue” to move onto the next step.
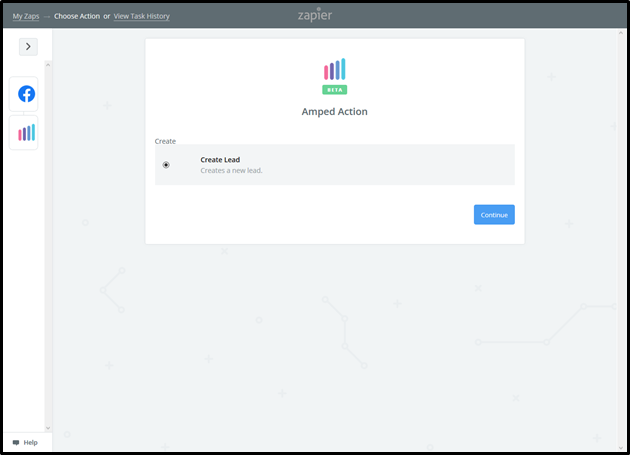
Next you will be prompted to choose the AMPED Action for this zap. The action “Create Lead” will be automatically selected in this template. Click “Continue” to connect and authenticate your AMPED account.
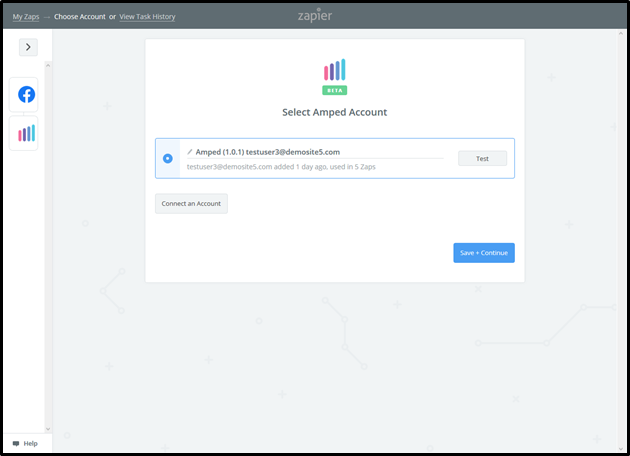
Any AMPED accounts you have already connected in Zapier will be available in this list. If you have not already connected an AMPED account or wish to connect another, click “Connect an Account”.
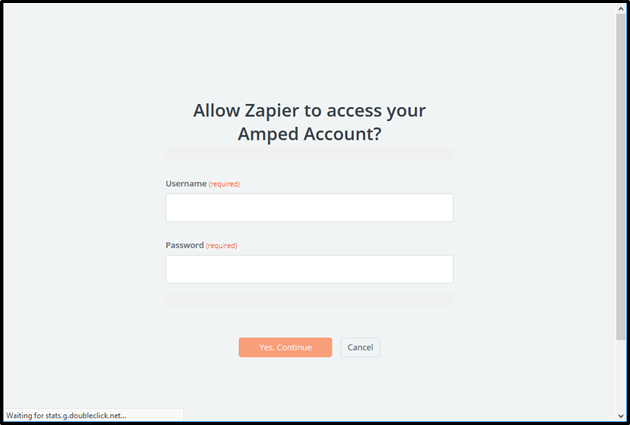
A new window will pop-up where you can enter your AMPED username and password. Click “Yes, Continue” to authenticate you AMPED account. If the new window does not open, check the pop-up settings in your browser.
When your account has connected you will see a green “Success!” notification. Click “Save + Continue” to move onto the next step.

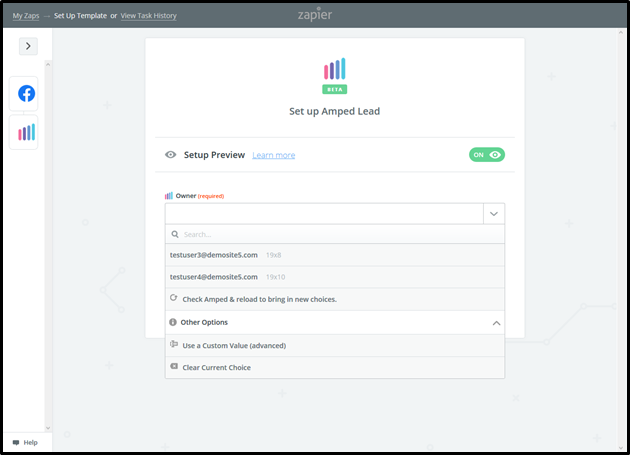
Now you must select which fields to map from Facebook Lead Ads to AMPED. Click on “Show advanced options” to see all available fields to select.
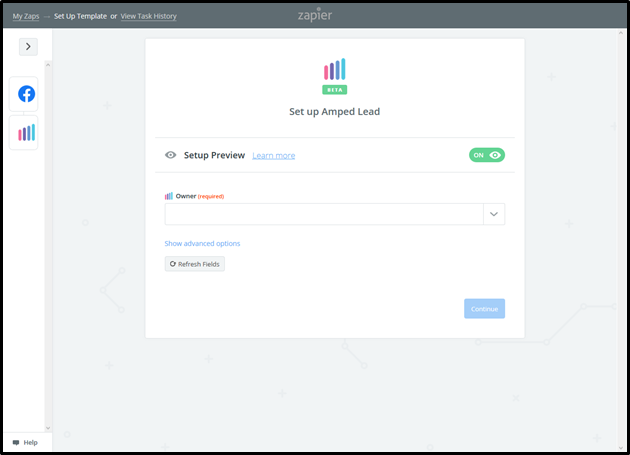
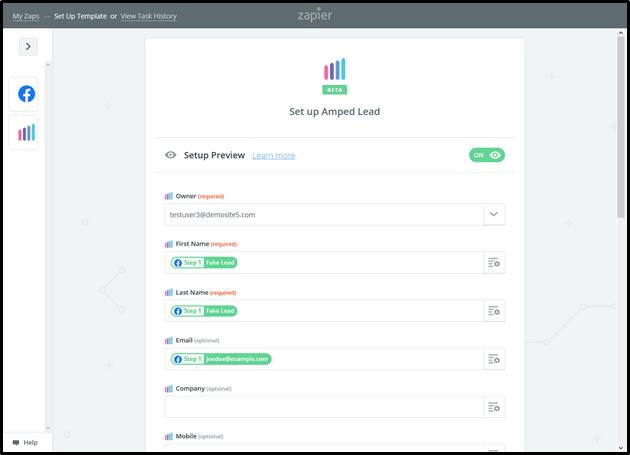
Every owner within your AMPED site will be available to select unless other permissions have been established. Select the owner you want the new leads to be assigned to and then map the remaining fields below.
Map the remaining fields and click “Continue” found at the bottom of the page.
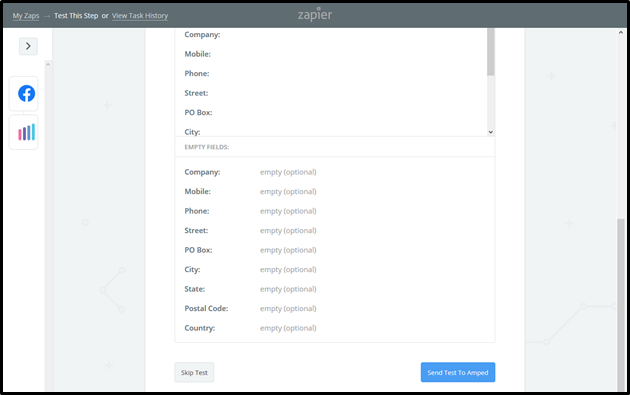
Next you will be asked to send a test lead to AMPED with the sample lead and fields you have selected. You may skip the test by clicking “Skip Test” or send the test lead by clicking “Send Test to Amped”.
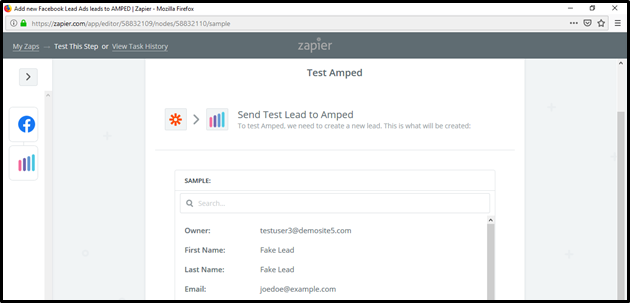
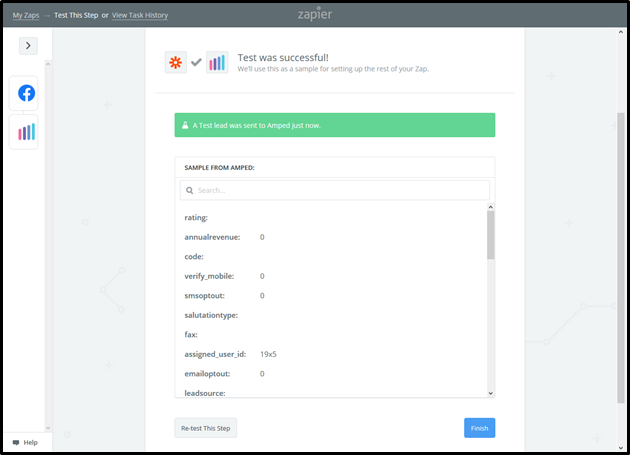
You will see a “Test was successful!” notification when the test zap has been executed. You can also check in AMPED for the test lead.
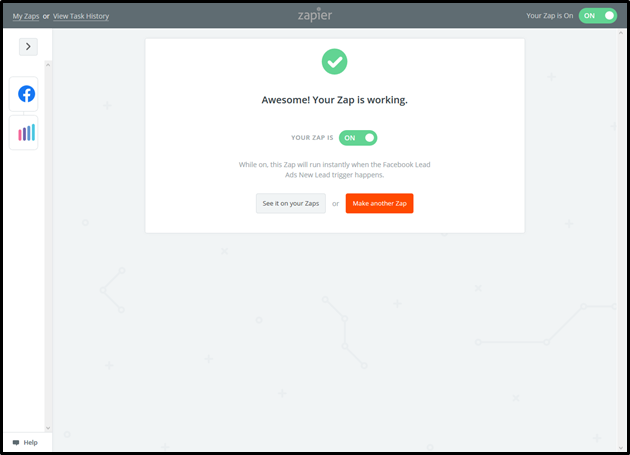
Clicking “Finish” will complete the Zap and turn it on. Congratulations! You have now configured your Facebook Lead Ads-AMPED zap! Now you can automatically add new Leads in AMPED from Facebook Lead Ads leads.