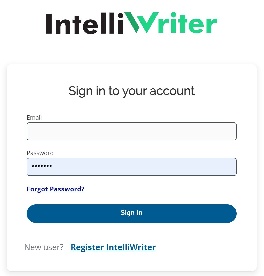
Logging In
- Using any major Web browser, navigate to https://app.intelliwriter.com *IMPORTANT! Please see your instructor if you are required to SSO through your LMS (Blackboard, Canvas, Microsoft...).
- Enter your username and password.
- Click "Sign In"
Sharing Documents
As you write drafts within IntelliWriter you may wish to share your work with collaborators or editors. To share your work complete the following steps:
- From the "File" section, click the "share" icon. (A window will pop up on screen.)
- By default, all documents are saved to the "Documents" folder. Find the document you wish to share.
- From the "Action" column, click "Share" for the document you wish to share.
- Enter the e-mail address of the person with whom you wish to share your document.
- Click "Add."
- Select a permission level. The permission level determines how much or how little control the shared-to person has over your document. If you select:
- Read - The person with whom you have shared the document can only read your document. He or she cannot change your writing or interact with your document in any way.
- Comment – The person with whom you have shared the document can read your document and add their comments. He or she can also change your writing.
- Write – The person with whom you have shared the document can read or write in your document. Writing includes adding to your writing, deleting sections, or performing other actions.
- Click "Share."

Accessing Shared Documents
CorrectEnglish gives you instantaneous access to documents that have been shared with you.
- From the "File" section of the ribbon, click the "Folder" icon. (A window will pop up on the screen.)
- Select the "Shared to Me" subfolder on the left side of the window.
Please note: The "Author" information to the right of the document name refers to the individual who shared the document with you. - Click on the shared document to open it and begin reading, commenting, or writing.
Managing Shared Documents
Managing shared documents is an important part of collaboration. Use the following steps to ensure that you have shared your document with the correct parties, you are aware of all documents that have been shared with you, and you are able to toggle between versions of a document. There are two main ways to view and manage documents shared by you and documents shared with you:
From a File
- From the "File" section of the ribbon, click the "Folder" icon. (A window will pop up on the screen.)
- Select from the "Documents," "Shared to Me," and "Shared by Me" subfolders.
- "Documents" allows you to:
- Share your documents
- Rename your documents
- Delete your documents
- Manage sharing permissions for your documents
- Click "Share" to view a full list of all the people with whom you have shared documents and their permission levels.
- "Shared to Me" allows you to:
- View all documents shared to you
- Click on the triangle icon to see all versions you and the author have created.
- View all documents shared to you
- "Shared by Me" allows you to:
- Share your documents
- Rename your documents
- Delete your documents
- Manage sharing permissions for your documents
- Click "Share" to view a full list of all the people with whom you have shared documents and their permission levels.
- "Documents" allows you to:
While in a Document
- Click on the "Review" tab.
- If the "Review" pane is not already open, click the arrow to open the "Review" pane.
- Click the -/+ icon to view:
- Current Reviewers
- Contributor History
- Comments
Commenting
Commenting is one of the many CorrectEnglish features that facilitate a thorough and productive writing process for users. This feature is perfect for editing documents or collaborating with peers. To add an embedded comment to a document:
- Using your cursor, highlight the section of text you wish to comment on.
- Right-click on the highlighted text.
- Select "Comment" from the drop-down menu. (A comment box will pop up on screen.)
- There are three ways to provide commentary:
- Type your commentary into the box.
- From the drop-down menu, choose a comment from our preset list of common comments.
- Record an audio comment by clicking on the red dot icon. (A recording box will pop up on screen.)
Please Note: You may need to click through an additional pop-up box to accept settings for this functionality. To accept these settings, click "Allow."- Click "Record."
- Speak your commentary into your computer's microphone.
- Stop recording at any time by clicking "Stop" or "OK."
Please Note: Audio comments are limited to 2 minutes in length.
- Click "Comment" to embed your comment within the document. The comment will immediately appear in the "Review" pane along the right side of the "Review" tab.

Collaborative Commenting
When collaborating with peers to edit documents, you have the opportunity to use the rich functionality of CorrectEnglish to its full effect. To enable and interact with collaborative comments:
- Click on the "Review" tab.
- If the "Review" pane is not already open, click the arrow to open the "Review" pane.
- Click the -/+ icon to view:
- Current Reviewers
- Contributor History
- Comments
- Within the "Comments" pane, click "Reply" to add a response to each specific comment.
Checking Grammar
One of the most valuable features within CorrectEnglish is the grammar check functionality, which provides you with specific edits, along with educational feedback, to improve your writing.
- Click on the "Grammar" tab.
- Click on the "Check" icon within the ribbon.
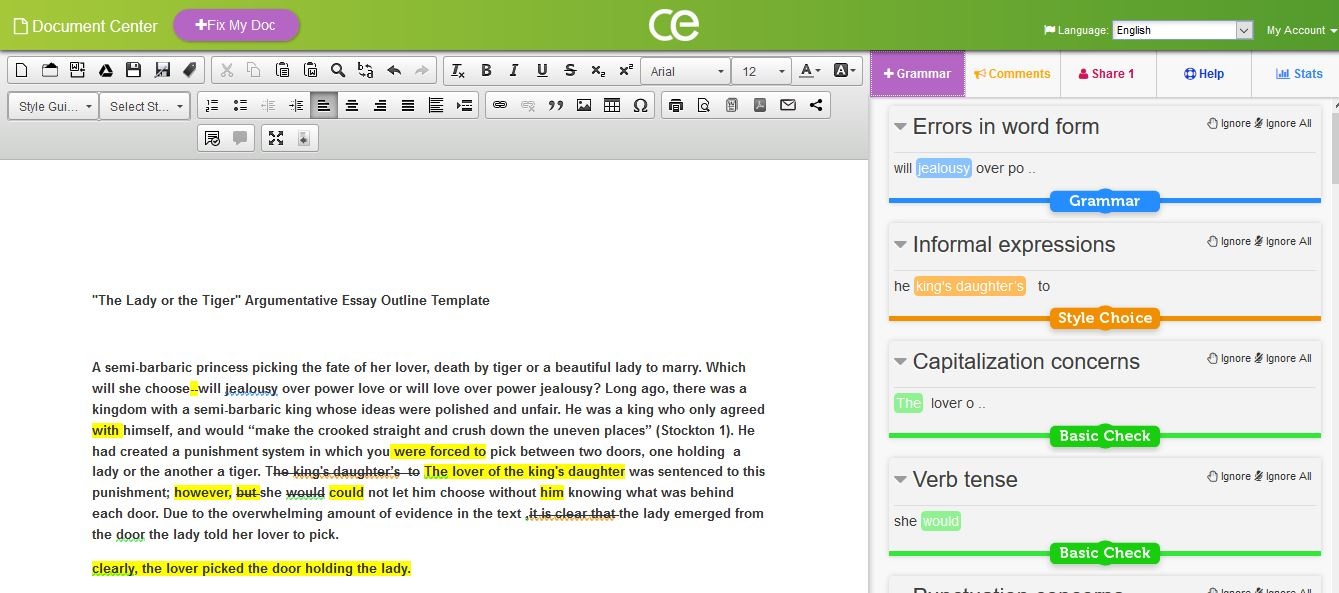
In-Text Grammar Check
The in-text grammar check underlines errors that are detected within the document. The following colors indicate various kinds of errors.
- Red: Spelling Error
- Green: Grammar and Usage Error
- Blue: Style Choice
To use the in-text grammar check:
- Using your cursor, hover over an underlined word or phrase to view a description of the error and suggestions for edits.
Please Note: The "hover" feature is enabled by default but can be customized according to your preferences (see call-out below). - For any given error, you can:
- Click "Ignore" to ignore the rule once (which removes the underline for this instance only).
- Click "Ignore Rule" to ignore the rule throughout the document (which removes the underline for any instance of this rule throughout your document).
Please Note: To add a rule to Grammar Check, go to "Settings" and make the changes in your "Preferences" section. Click here to learn more about "Preferences". - Click "Replace" to accept the proposed change.
Did you know... you can personalize the in-text grammar check? |
|---|
|
Grammar Check Pane
- If the grammar check pane is not already open, click the "Arrow" icon on the right side of the screen to open the "Grammar Check Pane".
The pane includes three sections, which are aligned and color-coded to match the in-text grammar check:- Red - Basic Check
- Green - Grammar and Usage
- Blue - Style Choice
.
- Click on the +/- to expand or collapse each of these sections within the pane.
- Check or uncheck subcategories of errors to show or ignore them in your document.
- Click on a given error to show a pop-up window with specific feedback regarding that error.