Page tree

Versions Compared

Key

  • This line was added.
  • This line was removed.
  • Formatting was changed.

Organization, site admins, and assignment managers can easily create and customize the assignments (tests, surveys, pathways)delivered test/pathway/practice/survey) delivered to examinees. This includes options to specify what content is displayed, how it is displayed, and when it is available.

Step 1. Click

To start, click on the Assignments link in the header to open the Assignments management page

NOTE: Site admin cannot view organization admins assignments.

  Enter the name of the assignment and select the type (test, survey, pathway). The list of tests will appear in the dropdown.  You can preview the test

Site admins can create assignments for their site only.

Assignment Management Video Tutorial  (right click to open in a new window or tab)

Step 1. Click on Add Assignment at the top to create a new assignment, or select an assignment from the list shown to make changes. Use the search bar at the top to narrow down search results. 

Step 2. On the Assignment Configuration page, enter the name and description (optional) in the boxes shown.

Step 3. Click on the Tests tab and choose the Test Type from the dropdown of available tests. Select the corresponding test. Preview the test if needed by clicking on the magnifying glass icon next to the name of the test.

Step

2.  Click on 

4. Click on the Settings tab to

configure settings

select a TimeZone. Important: this must be completed in order to save the assignment.

Step

3

5. Click on Security to set security settings. Click here for more on the Unlock Key option.

Step

4

6. Click on Tools to configure available tools (calculator, ruler, math formula,

proctractor, scientific calculator.

protractor, etc)

Step

5

7. Select Report to set the availability of the report to the examinee.

Step

6

8. Click on Time and Schedule to set timer settings.

Step

7

9. Click on Conditions to configure the availability of the assignment (i.e. all examinees, attribute based (i.e. only to examinees with grade attribute equal to 8).

Step

8

10 Click on Redirect to set the url of where the examinee will land once test is completed. Default value is the examinee dashboard.

Step

9

11. Click on Writing if the

test 

test is or contains an essay.

Step

10

12. Select Reminder to automatically email examinees the due date for the assignment.

Step

11

13.  Select Resources if you want the examinee to have access to additional materials before they start the assignment. These documents would be displayed on the the examinee dashboard next to the assignment name.

Step

12

14.  Click on AdapteraBuy if the assignment

will be

is available

in

from your organization's store. Please click on AdapteraBuy

  for

Assignment SettingsImage Removed

Security SettingsImage Removed

This appears on the right of the page:

 Image Removed   

Test Assignment Code: given to examinees so that they may work on the assignment. Examinees require test assignment codes to activate assignments given to them.  Self Registration Link:AdapteraBuy Link: 

 for additional information.

Click on ‘Add Assignment’ at the top of the Assignments page

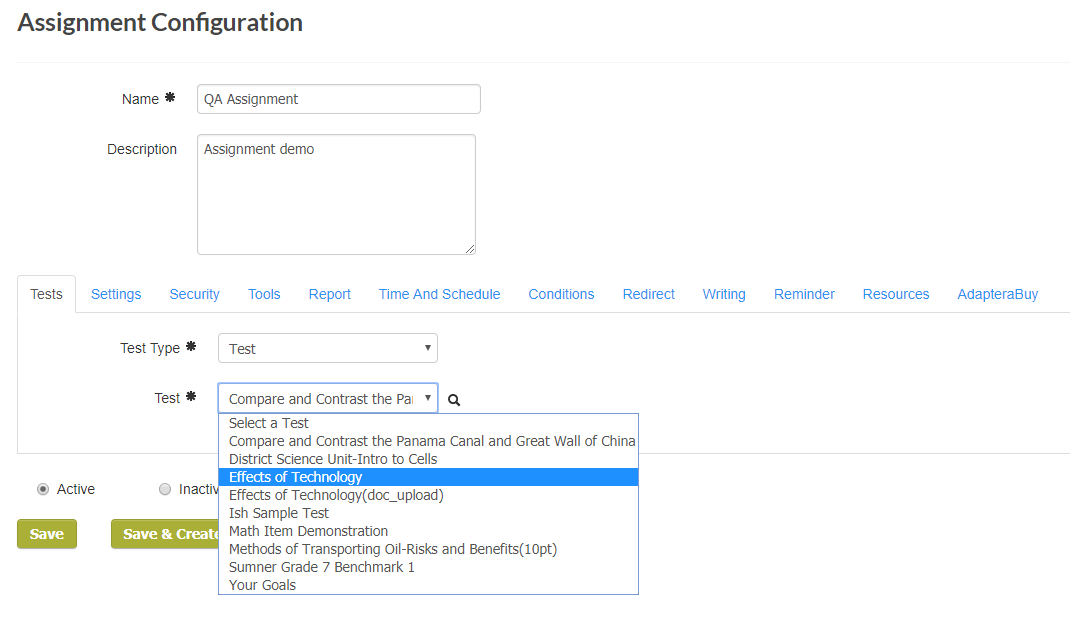
On the Assignment Configuration page, enter the name and description in the corresponding boxes

Under the Tests tab, select the assignment type from the dropdown list of available tests

Select the corresponding test

(Click on the icon to see a preview of the selected test)

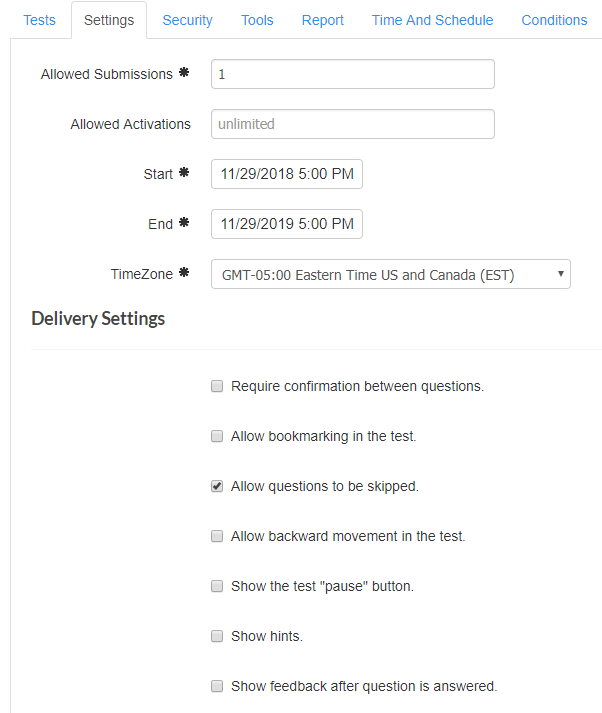
 Under the ‘Settings’ tab, select a TimeZone. As this is a required field, you will not be able to save the assignment unless this is selected.

  • The rest of the options are available to help customize assignments according to your specific needs.

  • Select the Active/Inactive status for the assignment.

  • Once you have completed entering all the required information and customized the assignment, Click on ‘Save’. (Fields marked with an 🞿 are mandatory)

Image Added

Image Added