.
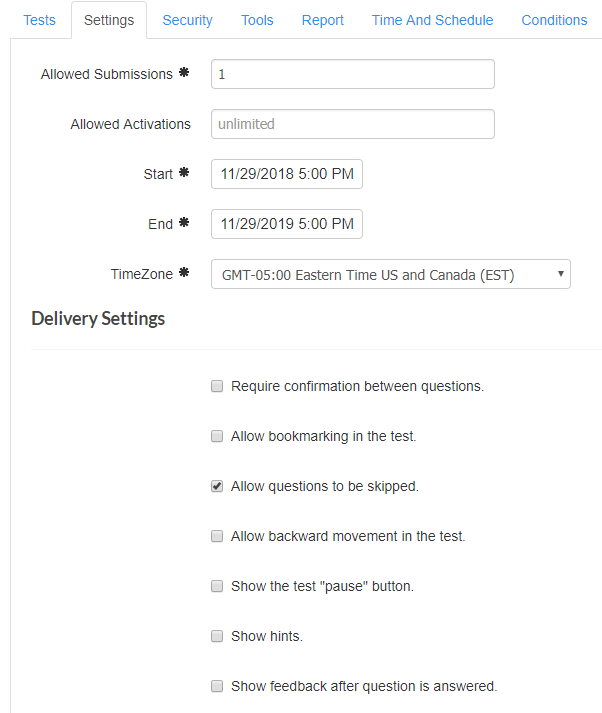
Step 4. Click on the Settings tab to select a TimeZone. Important: this must be completed in order to save the assignment.
Step 5. Click on Security to set security settings. Click here for more on the Unlock Key option.
Step 6. Click on Tools to configure available tools (calculator, ruler, math formula, protractor, etc)
Step 7. Select Report to set the availability of the report to the examinee.
Step 8. Click on Time and Schedule to set timer settings.
Step 9. Click on Conditions to configure the availability of the assignment (i.e. all examinees, attribute based (i.e. only to examinees with grade attribute equal to 8).
Step 10. Click on Redirect to set the url of where the examinee will land once test is completed. Default value is the examinee dashboard.
Step 11. Click on Writing if the test is or contains an essay.
Step 12. Select Reminder to automatically email examinees the due date for the assignment.
Step 13. Select Resources if you want the examinee to have access to additional materials before they start the assignment. These documents would be displayed on the the examinee dashboard next to the assignment name.
Step 14. Click on AdapteraBuy if the assignment