Adding an Item to Build
Step 1: Click on the Create tab at the top and choose Item to go to the Item Configuration Page.
Step 2: Enter the following information (fields marked with a * are mandatory):
- Name
- Bank: an item must belong to a bank. Choose the bank that this item will belong to. Click and drag mouse to choose multiple banks if needed.
- Description (optional): a short description related to the item or a particular reference.
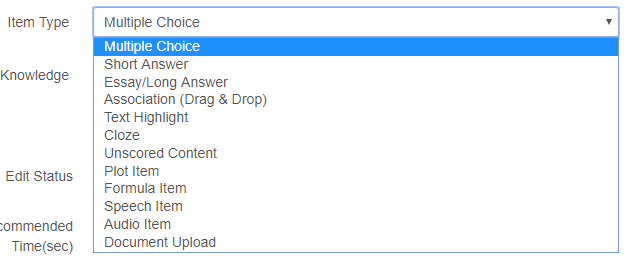
- Item Type: the image shows the item types that are currently available:
- Depth of Knowledge:
- Edit Status:
- Ready for Review
- Ready for Edits
- Signed Off
- Second Opinion
- Recommended time: an estimated time required to finish this item
- Unscored: Checking this will exclude this item from scoring

1. Item Types
- Multiple Choice
- Short Answer
- Essay/Long Answer
- Association (Drag & Drop)
- Text Highlight
- Cloze
- Unscored Content
- Plot Item
- Formula Item
- Speech Item
- Audio Item
- Document Upload
2. Layout & Content
Item Layout: This allows you to choose the type of layout (how the content, question and responses) the item will display.
- Passage: This is content usually in paragraph format that may be needed to answer the question.
- Stimulus: The question to be answered.
- Responses: Answer options are displayed here
Fluid: Removes empty spaces between the above components for an improved display.
Linked Item Content: Choose existing content to include in the item.
(Reference: Content Management)
Stimulus: This is usually where the item prompt (question) is added.
3. Alignment
Browse to choose from existing alignments, or add a new one if needed by clicking on the ‘+’ icon on the right of the box.
4. Metadata
5. Feedback
- Hint: suggestions or tips can be added here to help test takers choose the correct answers.
- Feedback: item explanations relevant information to the item may be included here.
6. Comments
Item will first need to be saved before adding comments for it

Preview:
On the right of the page, a preview panel is shown to see what the item looks like while building it. The check answers and show hint button help check to see if the item has been properly added and working.
